In this Blog, we are continuing our “How To” series, with a step-by-step guide regarding Configuring NTFS Allocation Unit Size 64 KB for SQL Server Drives.
The Step-by-Step Guide is formatted in a Task → Solution layout; please do us an immense favor and provide feedback in the comments section, as well as share this “How to” post on your Social Media Platform of choice using the Share Buttons at the end of the post.
Task ↓
You are configuring a new server and SQL Server Instance per Microsoft Best Practices; when reviewing SQL Server Installation and Configuration Best Practices, you will find the recommendation of Creating the Drives or Disk Partitions with a 64 KB Allocation Unit size (the following link references SQL Server 2005, however you will find the same recommendations for current versions as well):
https://technet.microsoft.com/en-us/library/cc966412.aspx
In the Technet article above, the ideal recommendation is to test a variety of I/O types and sizes; meaning to test 8 KB, 64 KB, 128 KB, 256 KB & 1024 for sequential I/O. There are various types of software that will allow you to test Disk I/O.
The widely known SQL Server Best Practice is using a 64 KB allocation unit size for Data, Logs, and TempDB drives/partitions.
However, if you are unable to test Disk I/O and want to use the widely publicized Microsoft Best Practice Recommendation, then following the step-by-step guide in the Solution section.
Solution ↓
Please follow the step-by-step instructions below to change the NTFS Allocation Unit Size to 64 KB on Data, Logs, and TempDB Drives; in this example, we will be working with the TempDB Partition in a Development Environment:
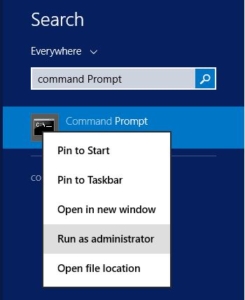
1. First, before changing the NTFS Allocation Unit Size, we need to determine what the current NTFS Allocation Unit Size is. Run Command Prompt as an Administrator:
2. Enter the following command from the code block below and hit Enter (screenshot of Command Execution is depicted below as well):
Diskpart.exe

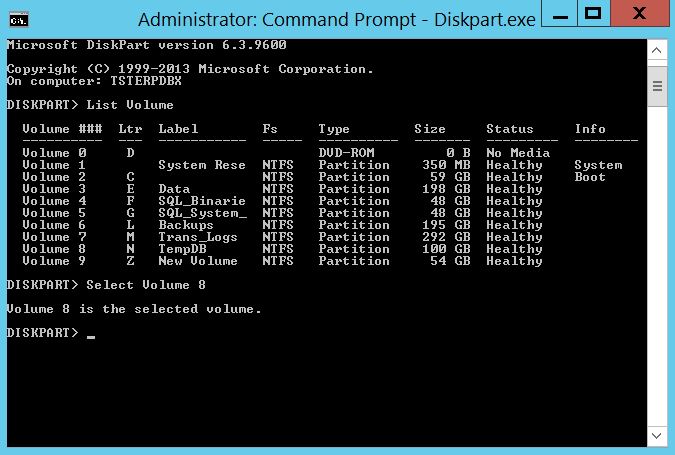
3. Once you are running Diskpart.exe from command prompt (should look like the image above), then Enter the following command from the code block below to List all Available Volumes and hit Enter (screenshot of Command Execution is depicted below as well):
List Volume

4. From the results of the previous List Volume command depicted above, we are able to determine that the TempDB Volume Number is 8. Next, Enter the following command from the code block below to Select Volume 8 (TempDB) and hit Enter (screenshot of Command Execution is depicted below as well):
Select Volume 8
5. With Volume 8 (TempDB) Selected, Enter the following command from the code block below to Return Volume Information for the TempDB Volume and hit Enter (screenshot of Command Execution is depicted below as well, which displays the Current Allocation Unit Size of Volume 8 TempDB):
Filesystems

6. In the screenshot depicted above, the current Allocation Unit Size for the Volume 8 (TempDB) is 4096, which is highlighted. Now, we will change the Allocation Unit Size to 64K; ensure that the Drive/Partition is empty, since changing the Allocation Unit Size involves formatting the drive (everything on the drive will be removed during the format process). The TempDB Data and Log files currently reside on the Volume 3 (Data Drive), so Volume 8 is empty. Open Disk Management, which can be opened via right clicking on the Windows Icon or searching for it as well:

7. Again, please ensure that your Drive/Partition is empty before proceeding; right-click on the Drive/Partition and select Format, as depicted in the screenshot below:

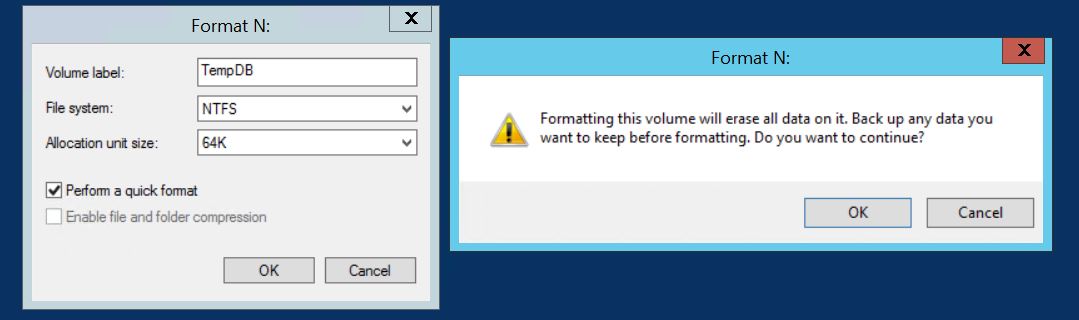
8. Select 64K in the Allocation Unit Size Drop-down, ensure Perform a quick format is selected, and click OK; on the Warning pop-up window, select OK again:
9. During the Formatting process, the Drive/Partition will display ‘Formatting' as depicted in the highlighted TempDB (N:) Partition below; when the Formatting process is complete, the drive/partition will then display ‘Healthy ….)' as depicted on the other Partitions:

10. Finally, with the Formatting process complete, repeat steps 1-5 again to verify the new Allocation Unit Size; in the screenshot below, the new 64K Allocation Unit Size is highlighted:

After following the steps above, your drive is now formatted with a 64K Allocation Unit Size; you can repeat the same steps for other drives/partitions as well. Always remember to move all files, etc. to a different drive before the formatting process! Or you could find yourself in a situation similar to Dwight's:

Don't forget to do us a HUGE favor and follow our Social Media Accounts, as well as Smash the Subscribe Button on our YouTube channel so that you will receive updates and notifications to video content as well.
I hope that everyone has an amazing day, stays focused, and makes as much progress on your goals as possible!
Is this valid for Hyper-V VM’s on a SAN?